One of the main new features in Ubuntu for the Raspberry Pi is the addition of the packages to support the Raspberry Pi Sense HAT. Specifically, the packages you’re most likely to be interested in are:
- sense-hat
- The main Sense HAT package which depends on all the other bits you’ll need (like the Python library detailed below) and a basic configuration with some reasonable calibration figures
- python3-sense-hat
- The official Python library for interfacing to the Sense HAT (note: there’s no corresponding python-sense-hat library for Python 2.x on Ubuntu because Python 2.x is no longer supported)
- sense-emu-tools
- The Sense HAT desktop emulator package which includes the GUI desktop emulator, and the sense_rec and sense_play tools
Fake HATs
We’ll start with the Sense HAT desktop emulator package for a couple of reasons (full disclosure: these reasons have nothing whatsoever to do with my having written it … no, sir!). Firstly you can play with it even if you don’t have a Sense HAT, but secondly if you do have a Sense HAT, then you can use all the demo scripts that come with it!
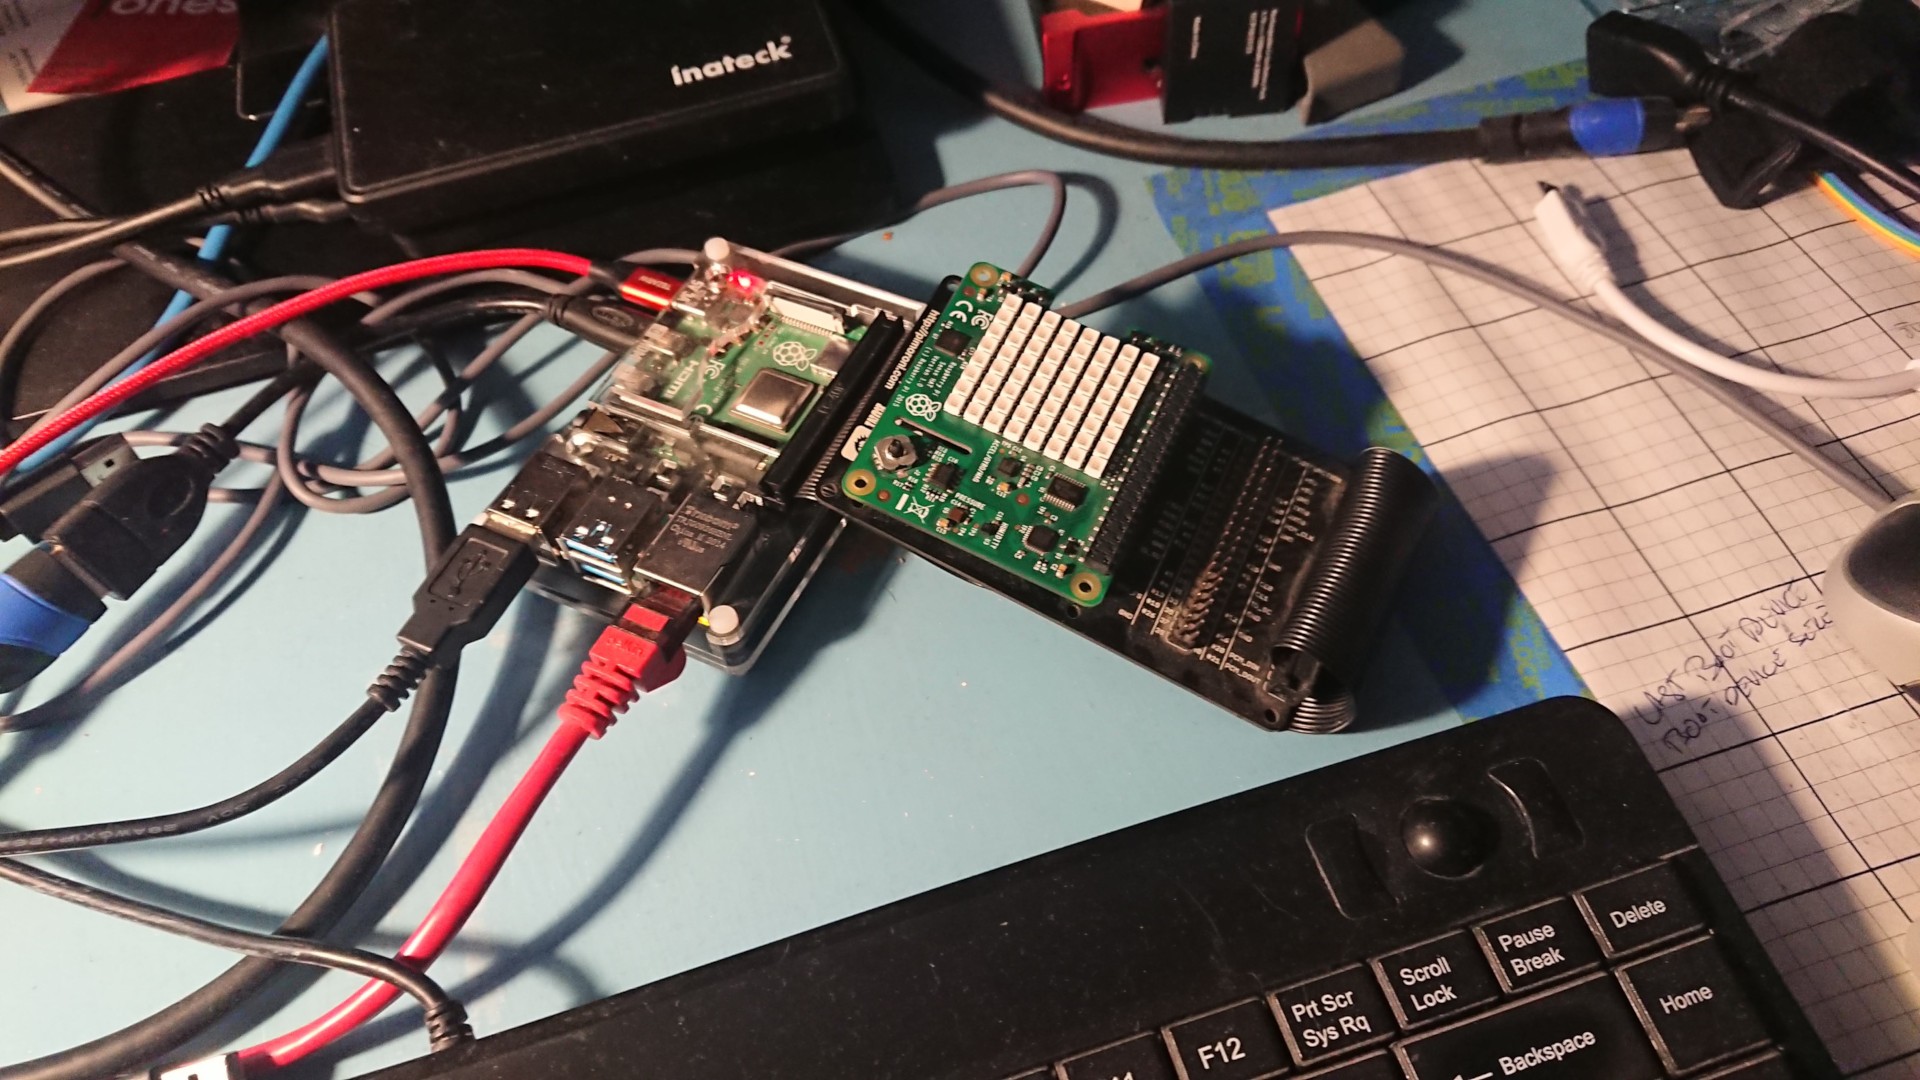
Let’s get started with installing the HAT. This is my (at this point positively ancient) Sense HAT, mounted on a Pimoroni Black HAT Hacker board (because it makes it far easier to wiggle around without worrying about HDMI cables and such):
When you switch on the Pi you should see a rainbow image on the Sense HAT (after an initially blinding flash, if you happen to be on a Pi 4 — don’t worry, this is normal!). Once the kernel starts, the rainbow on the Sense HAT will go blank.
Note
If you’re using the Ubuntu Desktop image, you may see the LEDs on the Sense HAT show an orange strip on a white background which I think is plymouth trying to show an Ubuntu logo on a very low-res screen (you don’t see this on the Server image, which has no “pretty” boot screen).
Once you’re logged in and at a terminal prompt, install the packages we want:
$ sudo apt install sense-emu-tools sense-hat
Next, install a decent code editor. Below I’m using Geany (anyone who knows me is now crying “Wot! No vim?”, but that’s not something I’d foist upon the unsuspecting):
$ sudo apt install geany
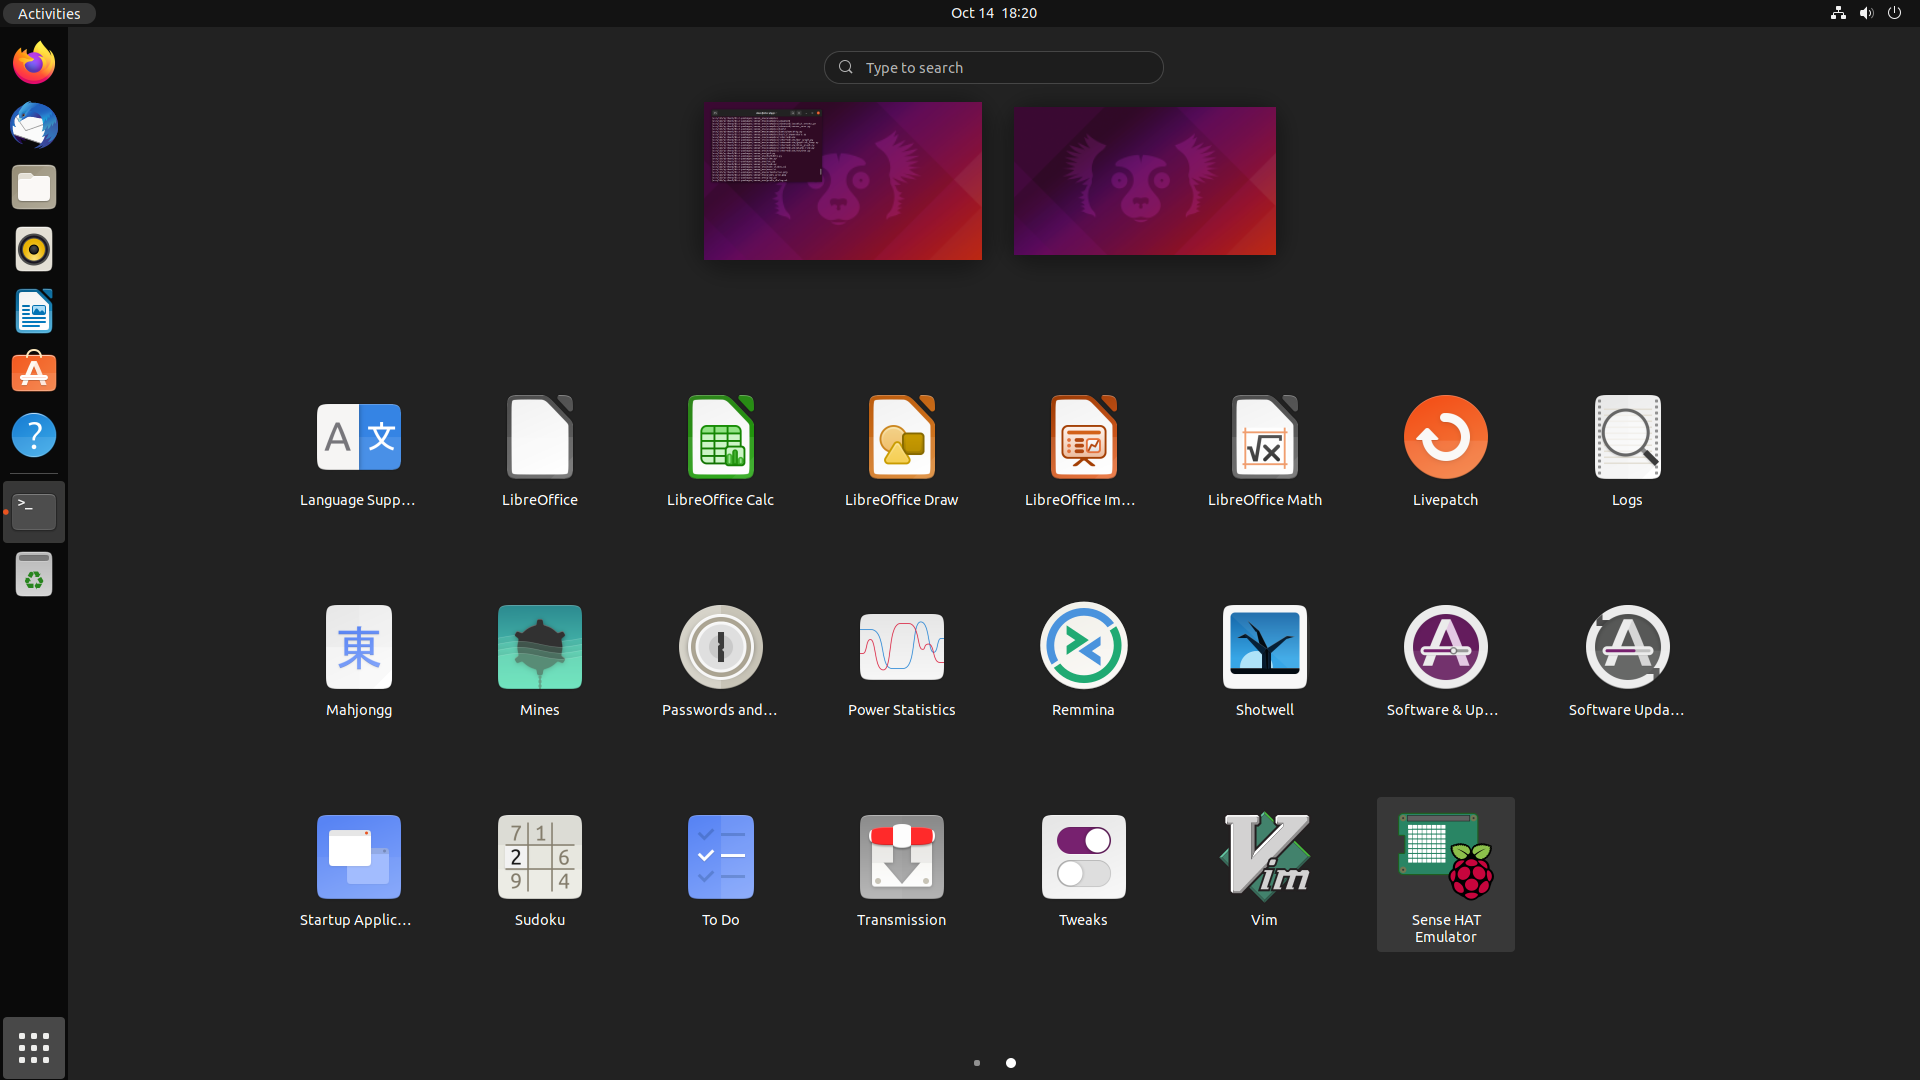
Next, start the desktop emulator, which you should find under Gnome’s application menu (or you can hit the Super key and just type “Sense”; it should find it):
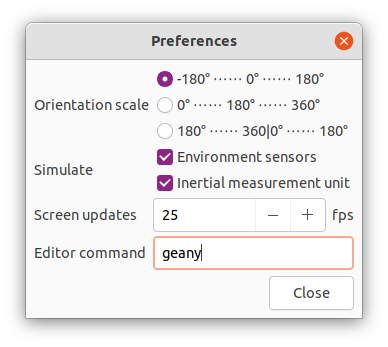
Finally (because I’m silly and forgot this bit), configure it to use geany (or your-choice-of-editor-here) because the default, thonny, isn’t in the Ubuntu archive … yet:
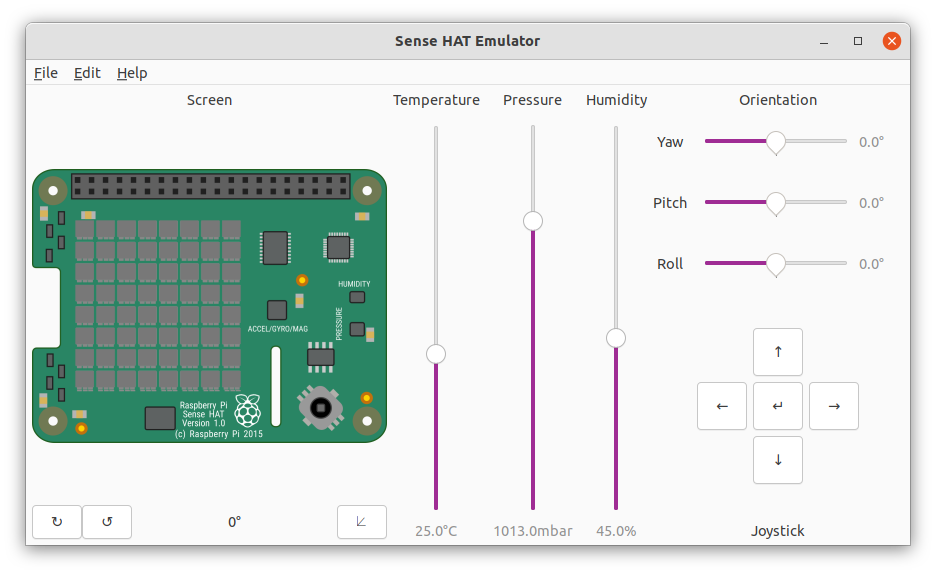
While you’re at it, I’d suggest activating the “Simulate environment sensors” and “Simulate inertial measurement unit” options too, as these make the emulation of these sensors more “realistic” (on those platforms with enough computing power, which is pretty much any modern computer with the exception of the Pi Zero).
Note
The Sense HAT emulator runs on any machine, not just the Raspberry Pi (you can install it on your Ubuntu PC running Impish), but we’re using on a Pi here partly to show how to use the emulator’s demo scripts with the real Sense HAT.
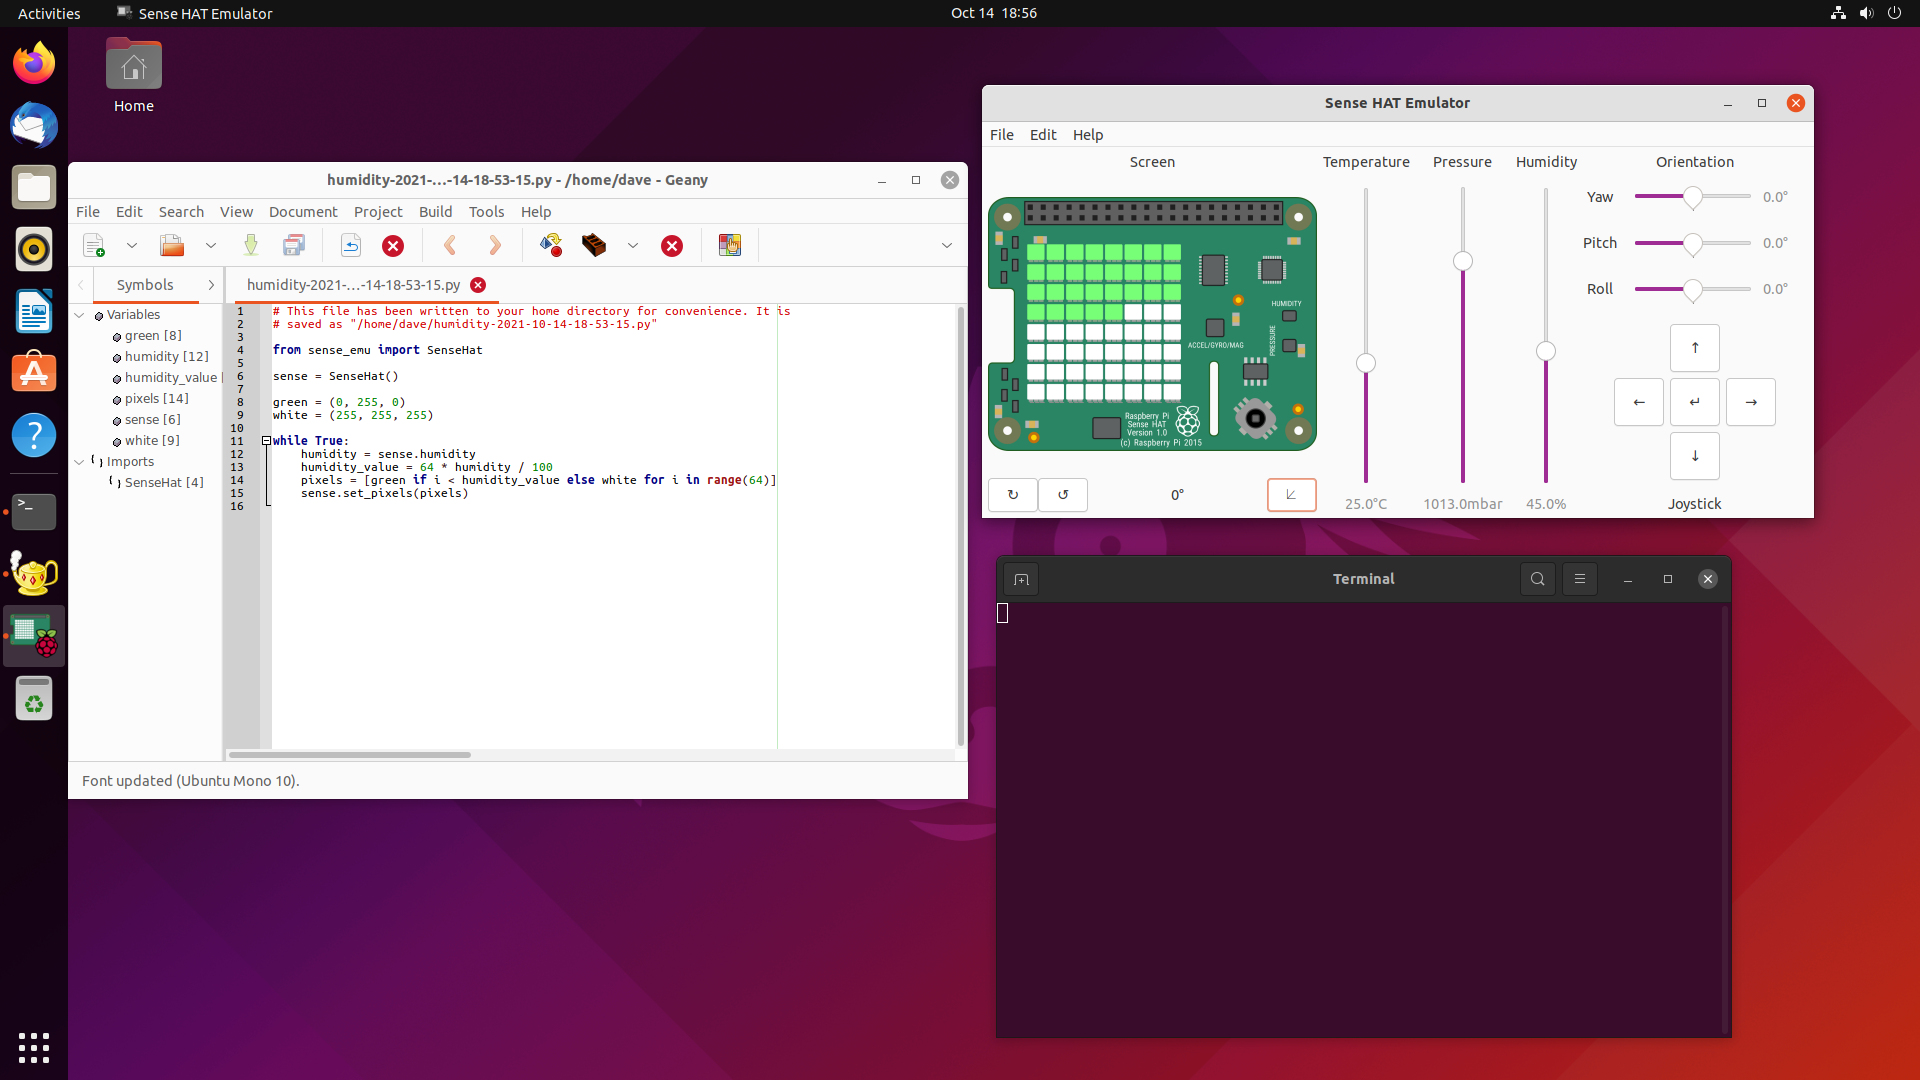
Let’s open up the humidity.py demo script. Go to “File / Open example / Simple / humidity.py” in the menus. This should fire up your chosen editor with a copy of this script, written to your home directory with a timestamp appended so that you can edit it as much as you’d like and subsequent selections of that entry will generate a “pristine” copy of the original:


If you’re using Geany (as suggested), there’s one more thing we need to before we can directly run this script. Geany still defaults to trying to call python rather than python3 when running Python scripts. Since Ubuntu no longer ships Python 2.x, the only interpreter is python3 (unless you’ve installed the python-is-python3 package), so we need to tell it to use this instead. Select “Build / Set Build Commands” from the Geany menu and change the Execute command to python3:
Finally, we can run our demo script. Select “Build / Execute” from the menu, or click the cogs icon in the toolbar. You should see the display on the emulated Sense HAT turn partly white and partly green. The number of green elements indicates the current humidity. If you drag the humidity slider up and down you should see the number of green elements change accordingly.
Note
If you activated environment simulation earlier, there may be some delay between you dragging the slider and the display updating. This is because the real sensor typically displays a certain delay in responding to changing humidity which the simulation emulates.
When you want to stop the script, press Ctrl+C in the (apparently empty) terminal window that appeared when you ran the script (that terminal actually contains the Python interpreter running your script). Feel free to modify the script and see what difference it makes when you run it. Simple changes could be modifying the colours used, more complex ones could change the orientation or appearance of the “graph”.
Real HATs
What about running our humidity script on the real Sense HAT though? This is pretty easy too. Firstly, edit the script to import from sense_hat instead of sense_emu. This is the only code change that’s necessary:
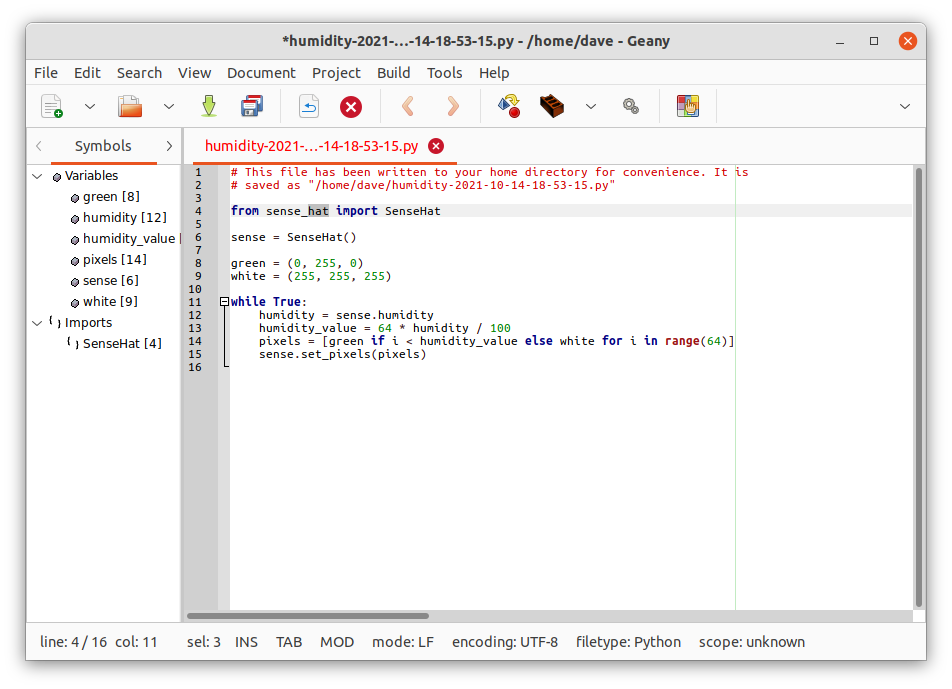
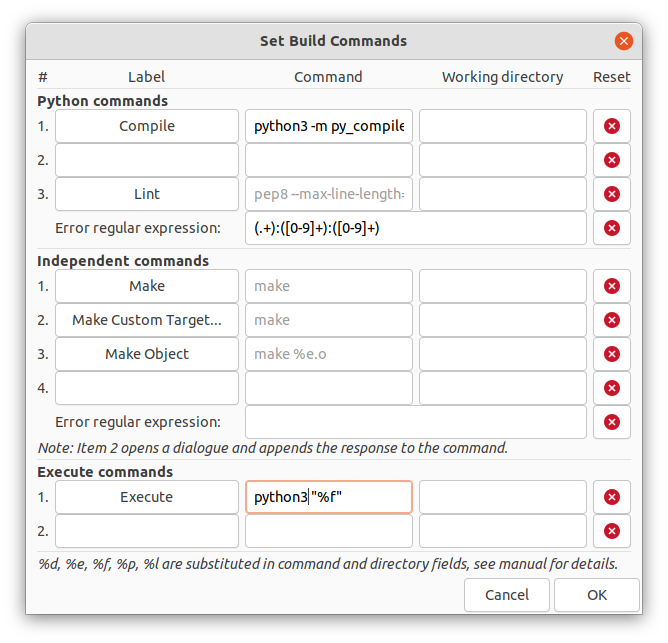
Next, we need to ensure our script starts as “root”. This is because the I²C bus that the Sense HAT uses is only accessible to root (by default, see below) under Ubuntu currently (this is something I need to correct — but carefully — before the next release!). Again, bring up Geany’s “Build / Set Build Commands” dialog, and change the Execute command to include a “sudo” prefix (i.e. it should read sudo python3 "%f":

Once again, select “Build / Execute” from the menu. This time, the terminal that appears will prompt for your password (which sudo needs to run things as root). Once entered you should see the script running on the actual Sense HAT on your Pi:
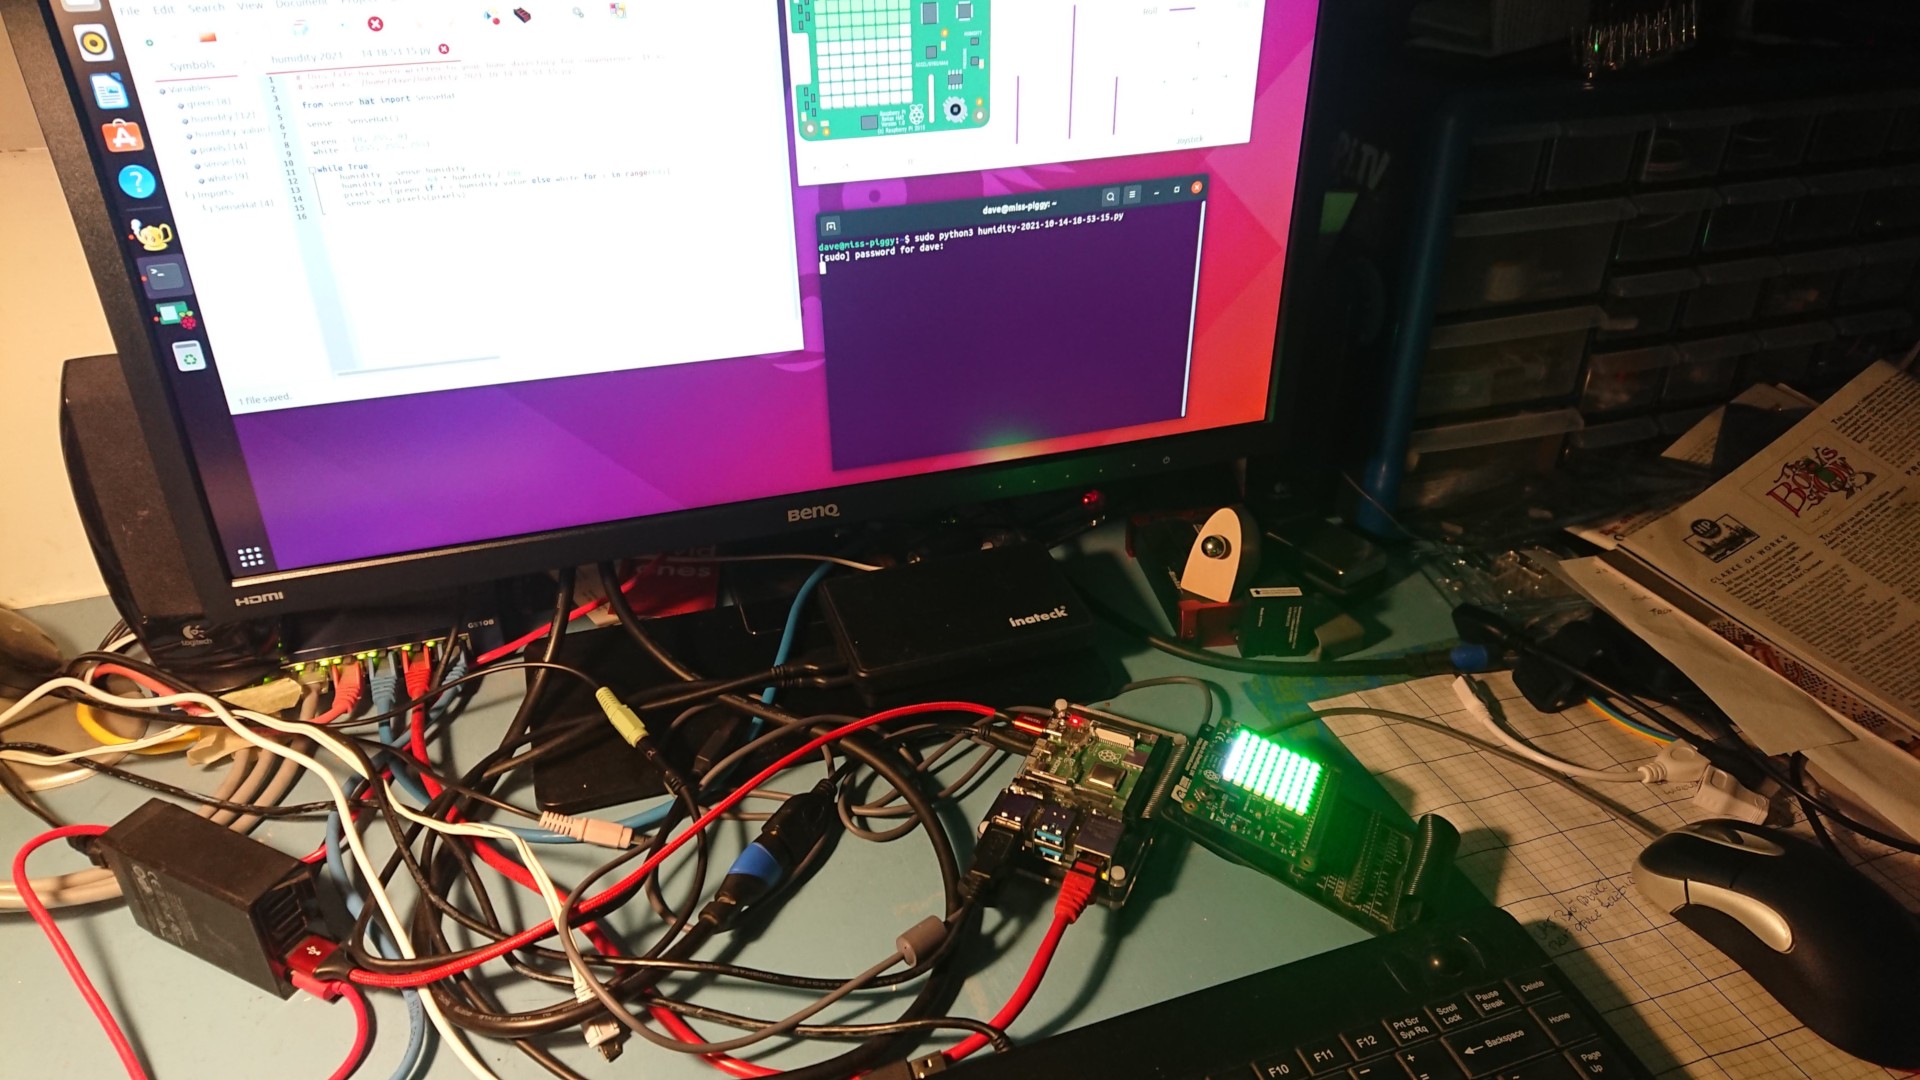
In the image above the reading is quite high as I’ve just breathed on the HAT. You can try the same and watch the reading spike up before falling back down (assuming your ambient relative humidity is fairly low that is!)
At this point, I’d suggest having a play with the other demo scripts available in the emulator. There’s plenty in there that deal with the various environmental sensors, the display, the joystick, and the IMU on the HAT. Have fun!
Rootless
If you want to use the Sense HAT without resorting to sudo or root, you need to add some udev rules to permit access to regular users. Add the following content to a file named /etc/udev/rules.d/99-user-sense.rules (you will need to be root to create/edit this file):
SUBSYSTEM=="i2c-dev", KERNEL=="i2c-[0123456]", GROUP="plugdev", MODE="0660"
SUBSYSTEM=="input", ENV{LIBINPUT_DEVICE_GROUP}=="*:rpi-sense-joy", GROUP="plugdev", MODE="0660"
SUBSYSTEM=="graphics", ENV{ID_PATH}=="*-rpi-sense-fb", GROUP="plugdev", MODE="0660"
Note
If you’re typing this instead of copying and pasting, pay close attention to the subtle distinctions between “==” and “=”. The first entries on a line use “==” as they’re matching events; the latter entries use “=” as they’re assigning values to the device.
After creating/editing this file, reboot the machine and you should find that you can access your Sense HAT without “sudo”.