See Also: A look at the Jammy desktop image.
In a deep movie trailer voice: “Previously on Dave’s blog“… “Oh no! My PC is no more! Whatever shall I do?!” “Oooh, a Pi 400 …”
Well, it’s been about 6 months since I started dog-fooding the Ubuntu desktop on a Raspberry Pi (and since I last managed to write a blog post … ahem). I’d originally intended to go back to using a big, fat, Watt-guzzling PC as my main development machine at some point in this cycle. However, a combination of global silicon shortages (if the damned crypto-miners could let me buy a single decent graphics card that’d be … nice?), and some major improvements in the Pi desktop meant I wound up spending the entire hirsute cycle using the little Pi 400 as my primary desktop.
The Hippopotamus in the Room
The biggest issue with this, as discussed in the previous installment, was video playback. We didn’t have video acceleration on the Ubuntu Desktop for Pi and this meant that, at the start of the hirsute development cycle, I still had to resort to my little laptop (a tiny Celeron powered thing) for video conferencing. However, at some point (a couple of months ago? I forget the precise timing as all sorts of work-arounds have been required at one stage or another) things came together, the planets aligned, the Gods of the Desktop smiled upon their lowly worshippers and Wayland+KMS started working.
Suddenly … things got much better.
For the past several weeks I’ve been using my little Pi 400 as my sole desktop. The laptop has been ditched entirely. HD YouTube playback works happily. Video conferencing over Google Meet works perfectly (no Zoom, but that’s because there’s no ARM builds of the client, ho hum), and the desktop generally feels responsive and slick.
There’s definitely a few kinks still to work out, but nothing show-stopping that’s made me dig the laptop out of storage or prevented me from Getting Stuff Done.
Making Hippos Fly
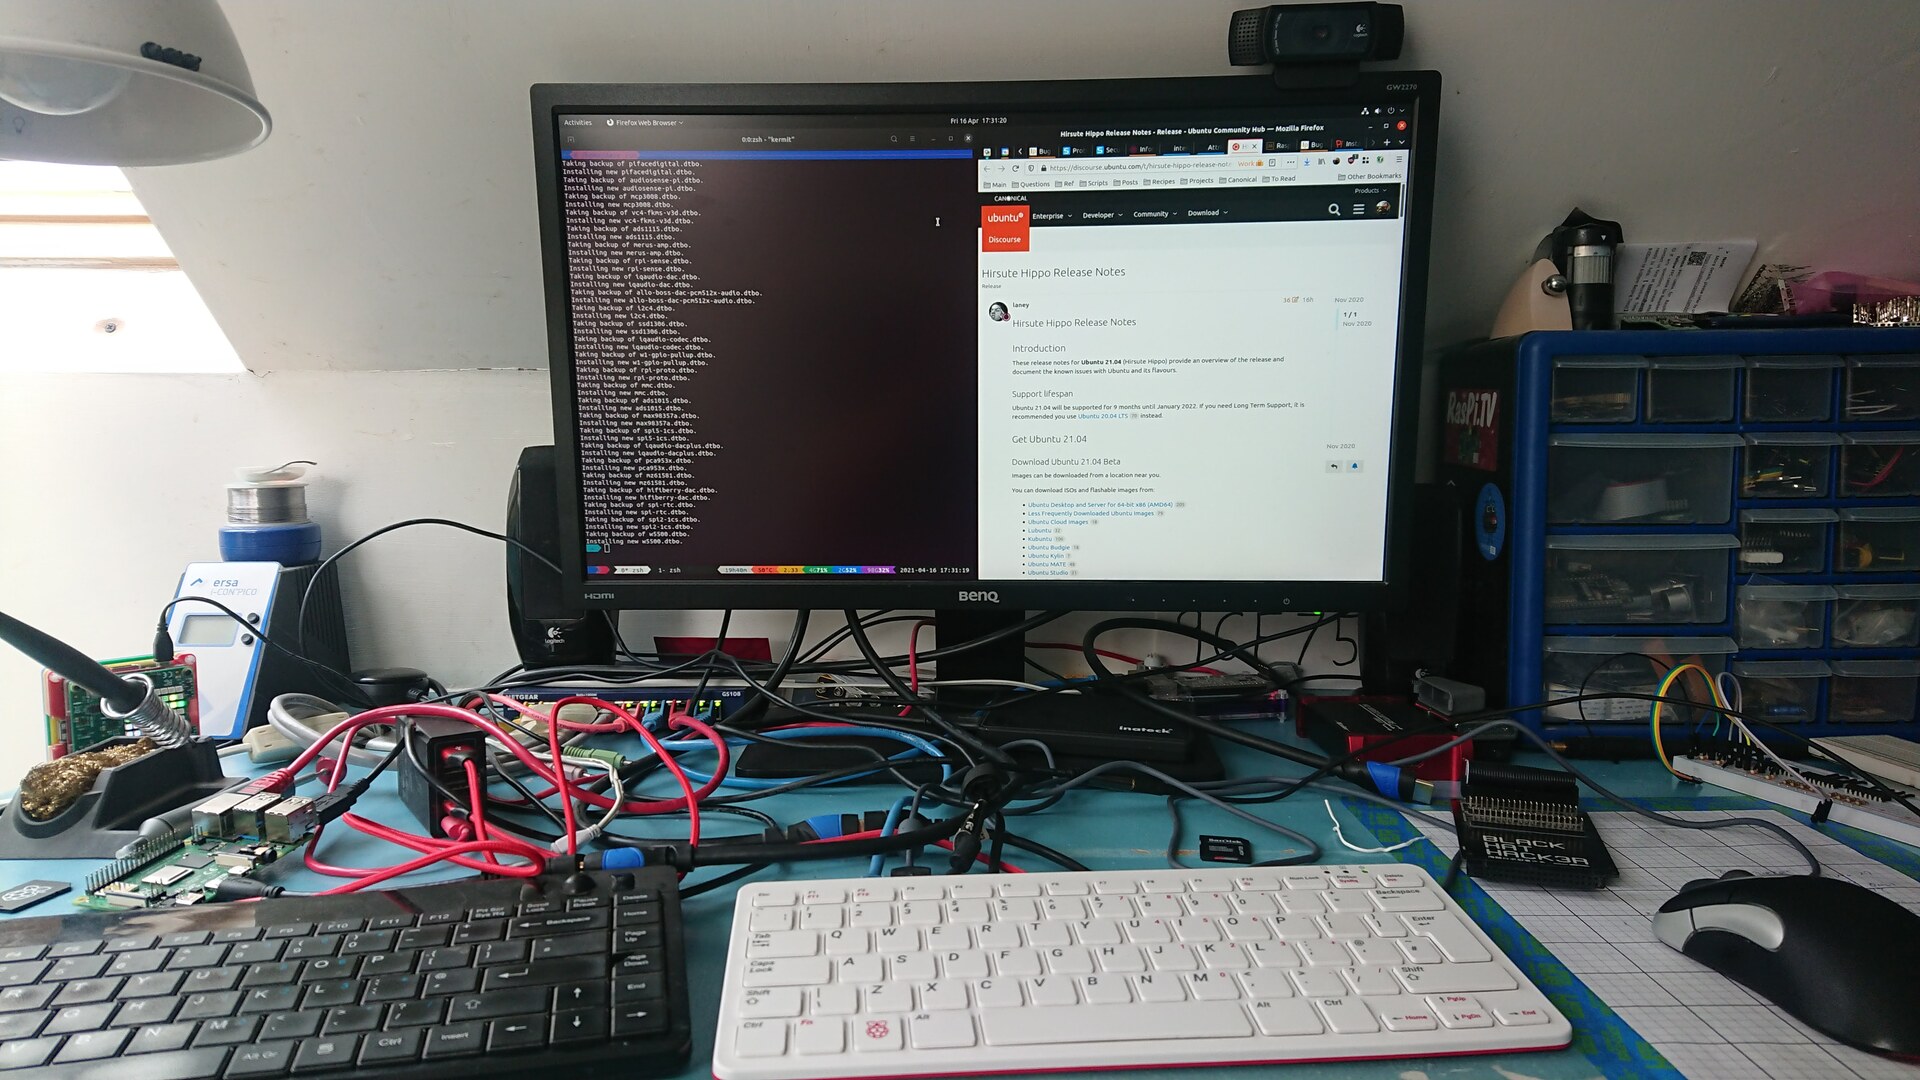
Above is a shot of my little desktop setup. Some optimizations to note:
I don’t have a fancy monitor. It’s bog-standard old 1080p HDMI thing. Personally, I can’t tell the difference between 1080p and 4K without squinting through my glasses anyway, but from a performance perspective having a 1080p monitor means no scaling is required to make the desktop readable. 200% scaling is fast under Gnome, but the result is frankly too big for my liking, and fractional scaling causes a noticeable performance hit. Choose your screen wisely!
Use the HDMI0 port. On the Pi 4, it’s next to the USB-C power port. On the Pi 400, it’s the one next to the SD card slot. In certain configurations, audio playback through HDMI only works from HDMI0.
It’s booting off an SSD connected to one of the USB3 ports (that little black box sat on the base of the monitor). We introduced support for booting Ubuntu over USB in groovy, and hirsute should work just as well. Simply flash the image to your USB drive and you’re good to go. But do note that you may need to enable USB boot in your Pi’s boot order first (this is one-time setup so if your Pi can already boot off USB, you’re good to go).
You can’t attach a Pi Camera Module to the Pi 400, so I’ve got an old Logitech C920 attached to one of the USB ports.
The Pi 400 only has 4GB of RAM. For lightweight desktops like LXDE this is okay, but Gnome shell is quite a bit heavier. The Ubuntu Desktop image for Pi does come with a 1GB swap file but honestly you probably want to extend this and I highly recommend using zswap (more on that below).
One advantage the Pi 400 does have over the Pi 4 is it’s much better at running cool. In turn, this means overclocking it is entirely viable even without any active cooling. At present I have the following lines added to my config.txt file on the boot partition, and the Pi 400 has been running with no heat / throttling issues for months:
arm_freq=2000
over_voltage=6
You might get away with these settings on a Pi 4, but you’d likely want some active cooling for that setup.
Swap, swap, glorious zswap!
As a rough rule of thumb, all systems should have swap. It doesn’t matter if your machine is a beast with 128GB of RAM, having some swap (not much, just a gig or two, say) is still useful as it permits the kernel to ditch pages that are never (or extremely rarely) used and use the RAM saved for disk cache (and there’s no such thing as too much of that!).
However, on a Pi 400 running a hefty desktop environment under 4GB of RAM it’s downright vital. As mentioned above, the images ship with a 1GB swap file (some may argue it would be preferable to create it on first boot, but it compresses trivially in the image, and this ensures that when people flash it they effectively “reserve” room for the necessary swap space). Ideally though (unless you’re on a beast like the Pi 4 8GB model), you probably want to expand this to something a bit bigger.
This can be easily done from the command line but I’d caution to do this when you’ve first booted the system and before you’ve launched anything else as the first step is to (temporarily) disable the swap. The following commands will add 1GB of size to the default swap-file on the desktop image:
$ sudo swapoff /swapfile
$ sudo fallocate -l 2g /swapfile
$ sudo mkswap /swapfile
$ sudo swapon /swapfile
Note
You could trivially add a second swap-file and this wouldn’t necessitate disabling the existing one, but that then means getting into editing the /etc/fstab file to add it and this is a bit easier to document. Use whichever means you are comfortable with, but the important thing here is that 1GB of swap probably isn’t quite enough on a system with 4GB of RAM.
Next, I would highly recommend enabling “zswap“. This is one of several forms of virtual memory compression provided by the Linux kernel. The other commonly used one is “zram“. I’m not enough of an expert to opine on the fine detail of these systems, but my rough rule of thumb is as follows:
- If you have no swap-file at all, zram is preferable. It provides a pseudo swap-file which is actually a compressed area of RAM and hence requires no swap-file backing it.
- However, if you have a swap-file, zswap is preferable. It acts as a write-back cache for the swap-file and can in certain circumstances avoid pages ever hitting the disk at all.
Don’t worry about the computational overhead of these systems. CPU speed and memory bandwidth have grown considerably faster than bulk storage IO bandwidth has. As a result, memory compression systems that (to some degree) prevent or reduce disk IO are almost always a win.
Anyway, because we definitely have a swap-file, we’re going to use zswap here. It’s trivial to enable, but we’re going to customize it a bit to get some more out of it. To enable zswap you simply need to add the parameter zswap.enabled=1 to your kernel command line:
$ sudo sed -i -e 's/$/ zswap.enabled=1/' /boot/firmware/cmdline.txt
This is sufficient to enable zswap; if you were to reboot at this point it would already be working. If you don’t want to get into things that are a bit more complex, then feel free to stop at this point — you’ll already have plenty of benefit.
Still here? Okay, zswap’s defaults are, if anything, a bit conservative. The default allocator (zbud) is limited to 2 compressed objects per page. A superior allocator (z3fold) permits 3 objects per page boosting the typical compression ratio. Furthermore, the default compression algorithm is “lzo” which is nice and fast, but doesn’t provide great compression. Other options include “lz4”, “lz4hc” (LZ4 with “high compression”), and “zstd”. Personally, I’ve gone for “lz4”; “zstd” is also tempting but remember we’re balancing compression with speed here, and despite zstd being better at compressing things, lz4 is very fast.
Unfortunately, we can’t “just” enable these as we enabled zswap above. We need to make sure that the modules for these features are included in the initramfs at boot time:
$ sudo -i
# echo lz4 >> /etc/initramfs-tools/modules
# echo z3fold >> /etc/initramfs-tools/modules
# update-initramfs -u
Then simply add some more parameters to your kernel command line:
# sed -i -e 's/$/ zswap.compressor=lz4/' /boot/firmware/cmdline.txt
# sed -i -e 's/$/ zswap.zpool=z3fold/' /boot/firmware/cmdline.txt
Now reboot and you should have your super-whizzy compressed RAM setup complete! To check everything is set correctly (after rebooting) you can run the following:
$ grep -R . /sys/module/zswap/parameters
/sys/module/zswap/parameters/same_filled_pages_enabled:Y
/sys/module/zswap/parameters/enabled:Y
/sys/module/zswap/parameters/max_pool_percent:20
/sys/module/zswap/parameters/compressor:lz4
/sys/module/zswap/parameters/zpool:z3fold
/sys/module/zswap/parameters/accept_threshold_percent:90
If things aren’t right, have a look at /boot/firmware/cmdline.txt in a text editor.
To see how zswap is performing:
$ sudo grep -R . /sys/kernel/debug/zswap
/sys/kernel/debug/zswap/same_filled_pages:3418
/sys/kernel/debug/zswap/stored_pages:242039
/sys/kernel/debug/zswap/pool_total_size:353652736
/sys/kernel/debug/zswap/duplicate_entry:0
/sys/kernel/debug/zswap/written_back_pages:0
/sys/kernel/debug/zswap/reject_compress_poor:368
/sys/kernel/debug/zswap/reject_kmemcache_fail:0
/sys/kernel/debug/zswap/reject_alloc_fail:0
/sys/kernel/debug/zswap/reject_reclaim_fail:0
/sys/kernel/debug/zswap/pool_limit_hit:0
I’ve even tried this on a Pi 4 2GB model and, while it’s not as nice as a Pi 400 (in particular due to the SoC running hotter), it makes it a pretty viable desktop at least for light usage. It was perfectly capable of firing up Firefox and playing an HD YouTube video, while also running LibreOffice Writer, and a terminal with vim, all on a $35 2GB Pi!
Note
I should note we don’t officially support using the desktop image on a 2GB Pi, but personally I think this little optimization makes it a reasonable platform for the Ubuntu desktop.
Hirsute Hippo’s due for release on April 22nd, and the release notes are definitely worth a quick peek.