Now that Martin’s given the game away on Twitter, it’s probably a good idea for me to post a quick guide on installing the new Ubuntu Desktop for the Pi on various media. So, here goes!
Stuff you’ll need
A Raspberry Pi Model 4B with 4Gb of RAM or higher. Theoretically, the desktop can run on less but we’re only officially supporting it on these models because with less than 4Gb of RAM it’s not a particularly “useful” experience!
The Raspberry Pi Imager tool for whatever platform you’re on.
The Ubuntu Desktop for Raspberry Pi image, for now anyway. Once Groovy’s released it’ll just appear in the menu in the imager tool, but for now you can grab the pre-release beta from:
http://cdimage.ubuntu.com/ubuntu/daily-preinstalled/current/
You need the groovy-preinstalled-desktop-arm64+raspi.img.xz image from there. You may note there’s no armhf image and the simple reason for that is we’re not providing one at this time; it’s arm64 only.
Now, continue with one of the sections below…
SD Card
To install on an SD card is pretty much simplicity itself:
- Start the Imager Tool
- Click “Choose OS”, select “Use custom”, and select the file you downloaded earlier; you don’t need to decompress it (after release you’ll be able to pick an entry under “Ubuntu”)
- Click “Choose SD Card”, select the card you want to flash
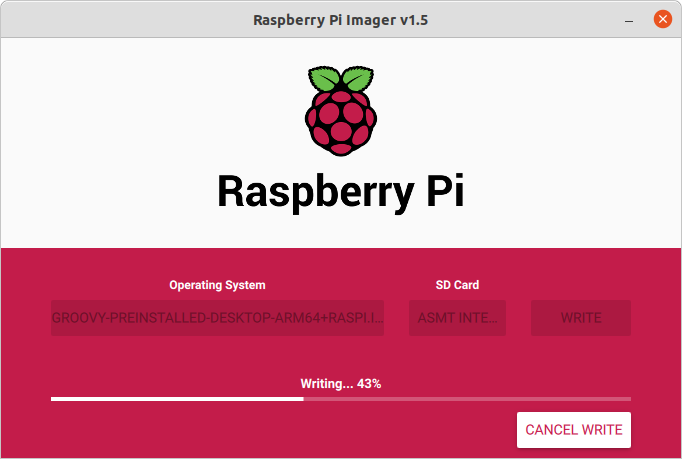
- Click “Write”
Then you can boot the card on your Pi 4.
USB HDD / SSD
In Groovy we’re (finally!) adding support for booting Ubuntu directly from a USB attached hard-drive or SSD with no SSD card involved. The first thing to ensure is that you’ve got an up to date EEPROM version on your Pi 4 (as USB booting was added after the Pi 4’s release). This is easy enough to accomplish under either Raspbian or Ubuntu:
- sudo apt install rpi-eeprom - only strictly necessary on Ubuntu as it’s installed by default on Raspbian, but it won’t do any harm there
- sudo vcgencmd bootloader_config > bootconf.txt - extract the current bootloader configuration to a text file
- sed -i -e '/^BOOT_ORDER=/ s/=.*$/=0xf41/' bootconf.txt - set the BOOT_ORDER option to 0xf41 (meaning attempt SD card, then USB mass-storage device, then repeat; see pi4 bootloader configuration for more information). Alternatively vim bootconf.txt and make the edits yourself if you don’t trust my sed-hacking :)
- rpi-eeprom-config --out pieeprom-new.bin --config bootconf.txt /lib/firmware/raspberrypi/bootloader/critical/pieeprom-2020-09-03.bin - generate a copy of the EEPROM with the updated configuration
- sudo rpi-eeprom-update -d -f ./pieeprom-new.bin - set the system to flash the new EEPROM firmware on the next boot
- sudo reboot - to apply any changes (the EEPROM is only updated during the early stages of boot)
Note
Don’t worry about having to do this on every EEPROM upgrade because you don’t have to. Each EEPROM upgrade extracts the current EEPROM configuration and merges it with the updated EEPROM binary before flashing it.
Now that the EEPROM’s dealt with, how do we get the image onto a hard drive?
- Read the SD Card instructions above
- Pretend your USB-attached hard-drive is a very fat SD card and just select it instead when you click on “Choose SD Card”
- erm … that’s it
You should now be able to boot your flashed drive on your Pi 4 off your USB-attached hard-drive without any SD card inserted. Be aware that some drives have issues being used to boot the Pi. In particular:
- Spinning hard-disks required a lot more power than SSDs and will very likely required a powered USB hub. If you have a stonkingly huge hard-drive, see the next section too…
- Hubs themselves can cause compatibility issues, so frankly you’re much better off with an SSD to boot off (typically no need for a hub and no spin-up time issues).
There’s lots of good information on both the Pi forums and various GitHub issues for debugging boot issues; here’s a selection of links in a rough “look at this first” order:
Stonkingly huge HDD / SSD
What if you have a hard-drive larger than 2Tb (or SSD if you’re richer than Croesus) and want to actually use all that space? The default MBR partitioning on the image won’t be much use as it can’t address anything beyond 2Tb. Thankfully, the Pi’s bootloader now supports GPT partitioning too so this isn’t a big deal and just requires a minor tweak to the partition table.
The following instructions are Linux-specific. I’m sure it’s possible to do this on Windows and Mac OS too, but you’ll have to Google that if you need it. I would advise doing this with the drive attached to another machine (i.e. when you’re not booted from it). It might be possible to do this on a “live” system, but I haven’t tried that so YMMV!
- sudo apt install gdisk - just to make sure you’ve got gdisk (the GPT partitioning tool) installed
- sudo gdisk /dev/sdX - where sdX is whatever your hard-drive is called (consult the end of dmesg for a hint)
- If gdisk complains about a valid MBR and a corrupt GPT, don’t worry (this can happen when re-imaging drives that’ve had a GPT partition table before). Just select 1 to use the valid MBR and continue
- gdisk should’ve converted your MBR partition table to GPT in RAM (not written
to the disk yet). Enter p to print the table and make sure it looks
relatively sane:
- two partitions,
- a small one with type 0700 (“Microsoft basic data”) which is the boot partition, and
- a larger one with type 8300 (“Linux filesystem”) which is the root partition
- Enter w to write the new partition table to the disk and exit.
- Safely eject the drive and boot from it!
Note that you can do this before the first boot, or you can do it later on. However, if you do this after the first boot you may need to manually resize the root partition to take up the full disk size (if that’s what you want). If you do this before the first boot, the image should expand the root partition to fill the disk (I’ve checked resizing works under GPT, but I haven’t got a spare HD >2Tb to actually try that with! :).
Have you actually tested this?
For the last week I’ve been using the desktop image on and off on a Pi 4 with 4Gb of RAM (I’ve got an 8Gb model here, but obviously the point is to try and validate that 4Gb is “sufficient”), with my little laptop as a backup. However, this week I’m embarking on something a little more adventurous: using it full time as my only desktop (laptop strictly for emergency backup only, and no desktop either because … well, it sort of blew up).
The specific configuration I’m using is: booting off a small 120Gb SSD I had spare. Anyway, if I come up with any tweaks along the way I’ll post a write-up later this week. Wish me luck!